ABI Classroom Edition logo

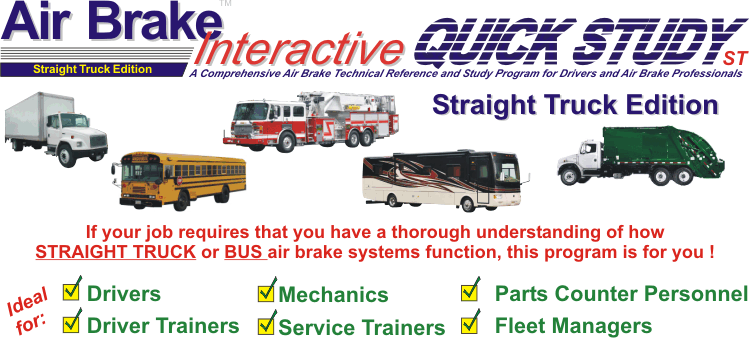
AIR BRAKE Interactive QUICK STUDY ST Straight Truck & Bus is a user-interactive, self-study multimedia program designed to provide drivers, driver trainers, mechanics, service trainers, parts counter personnel, and fleet service managers with a thorough understanding of straight truck and bus air brake systems.

AIR BRAKE Interactive QUICK STUDY ST isa multimedia user-interactive air brake technical reference and knowledge resource drivers, driver trainers, mechanics, service trainers, parts counter personnel, and fleet service managers.

What’s Included:

Sample Animations


If your job requires a thorough understanding of how Straight Truck and Bus air brake systems function, this program is for you.

Ideal for:

»Drivers»Mechanics» Parts  Personnel
» Driver Trainers» Service Trainers» Fleet Managers
We’re SERIOUS about IMPROVING AIR BRAKE EDUCATION for everyone!

Recognizing the need for vastly improved air brake knowledge and education in the truck transportation industry, we’ve instituted a new QUICK STUDY licensing and pricing policy. Fleets, heavy vehicle repair facilities, heavy-duty parts store chains, vehicle safety inspection authorities, and trucking associations can now acquire our AIR BRAKE Interactive QUICK STUDY Truck & Bus program in a manner and at a price that meets their exact needs.

We are committed to working with each client, on one, to formulate a solution for their specific air brake training needs.  Whether you simply need a fast and effective air brake educational program, for your driver trainers to present, or you want to provide each driver with his or her air brake self-study program, we’ll work with you to make it happen.

Visual Learning at its BEST

The AIR BRAKE Interactive QUICK STUDY ST sets a new standard for visual learning by employing detailed visuals and state-of-the-art multimedia animations of air brake circuits and components. With voice narration accompanying every illustration and animation, this program enables you to see, hear, and fully understand the functionality of a typical air brake system.

Beyond just learning about system operations, you will gain practical knowledge on how to:

  • Conduct quick and effective air system inspections.
  • Perform simple yet accurate functional tests.
  • Carry out routine daily maintenance efficiently.

And the best part? NO READING REQUIRED! Every step is voice-narrated, ensuring an engaging and easy-to-follow learning experience tailored for all learners.

A Fully Functional Air Brake Board – ON YOUR COMPUTER!

In addition to discussions, visuals, and animations illustrating vehicle dynamics and the function of numerous individual air system components and circuits, AIR BRAKE Interactive QUICK STUDY ST provides you with what is essentially a complete and fully functional MULTIMEDIA  ANIMATED  AIR  BRAKE  BOARD.  A physical air brake board capable of visually demonstrating the function of a typical air brake system would cost tens of thousands of dollars, not to mention that physical air brake boards are large, cumbersome,e and heavy, making them extremely difficult to transport. With AIR BRAKE Interactive QUICK STUDY ST you’ll have a fully functional multimedia air brake board – on your computer!  

Program Run and Study Times

The AIR BRAKE Interactive QUICK STUDY ST multimedia presentation provides a comprehensive learning experience through approximately 58 minutes of voice-narrated visuals and air system animations. While the core presentation is concise, the actual time required to complete the entire program, including instructor-led discussions and student interactions, will vary. On average, this can take between 2 to 3 hours.

Instructors have the flexibility to tailor the program delivery to suit specific student needs or classroom schedules. They can choose to present the entire program or focus on selected components or modules as necessary. This modular approach ensures adaptability for a range of educational scenarios, optimizing learning outcomes and accommodating time constraints.

Your Custom AIR BRAKE Interactive QUICK STUDY ST Program

The AIR BRAKE Interactive QUICK STUDY ST program offers a personalized touch by being custom-prepared to include your fleet, company, or school’s name and logo. This feature ensures that the program aligns with your organization’s identity, making it a tailored and professional training solution for your team or students.

For more information on each module, click on the “v”.

QS-ST Content
This module provides drivers and students with an in-depth understanding of the fundamental factors and physics of braking.

Key topics covered include:

1. Basic Vehicle Physics in Braking

1.1 Newton’s Laws of Motion

  • First Law (Inertia): A moving vehicle will remain in motion unless acted upon by an external force, such as braking.
  • Second Law (F = ma): The force required to stop a vehicle is directly proportional to its mass and acceleration.
  • Third Law (Action and Reaction): When brakes apply force to slow the vehicle, the road exerts an equal and opposite force on the tires.

1.2 Kinetic Energy

  • A moving vehicle possesses kinetic energy proportional to its mass and the square of its speed: KE=12mv2KE = \frac{1}{2} m v^2KE=21​mv2
  • The braking system must dissipate this energy as heat to stop the vehicle.

1.3 Stopping Distance

Stopping distance depends on three key factors:

  • Perception Distance: Time it takes for the driver to perceive the need to brake.
  • Reaction Distance: Time it takes for the driver to initiate braking.
  • Braking Distance: Distance the vehicle travels while the brakes slow it down.

2. Dynamics of Air, Fluid, and Springs in Braking Systems

2.1 Air Dynamics

  • Compressed Air: In air brake systems, compressed air transmits force from the brake pedal to the brake chambers.
  • Pressure and Volume: The relationship between air pressure and volume (Boyle’s Law) affects the responsiveness of the braking system. P1V1=P2V2P_1 V_1 = P_2 V_2P1​V1​=P2​V2​
  • Air Lag: A delay occurs as air travels through the lines, which must be accounted for in stopping calculations.

2.2 Fluid Dynamics

  • Hydraulic Brakes: Use fluid to transfer force from the pedal to the brakes.
  • Pascal’s Principle: Pressure applied to a confined fluid is transmitted equally in all directions. P=FAP = \frac{F}{A}P=AF​
  • Fluid Resistance: Fluid viscosity and line length can affect braking performance.

2.3 Spring Dynamics

  • Spring Force: Springs in brake chambers provide the mechanical force for parking and emergency brakes. F=kxF = k xF=kx Where FFF is the force, kkk is the spring constant, and xxx is the displacement.
  • Energy Storage: Springs store potential energy, which is released during emergency braking.
  • Compression and Tension: Proper spring maintenance ensures consistent braking performance.

3. Factors Affecting Braking Performance

3.1 Vehicle Weight

  • Heavier vehicles require more force to stop due to increased momentum and kinetic energy.

3.2 Road Conditions

  • Wet, icy, or uneven surfaces reduce friction between tires and the road, increasing stopping distance.

3.3 Tire Condition

  • Proper tire tread and inflation are essential for maintaining friction and control during braking.

3.4 Brake System Maintenance

  • Worn components, air leaks, or fluid contamination can reduce braking efficiency.

3.5 Speed

  • Doubling the vehicle’s speed increases stopping distance by four times due to the quadratic relationship with kinetic energy.

3.6 Driver Reaction Time

  • Human factors, such as fatigue or distraction, can delay braking response.

4. Hands-On Training and Demonstration

  • Interactive Physics Simulation: Students will observe how mass, speed, and friction affect stopping distance.
  • Air Brake System Operation: Demonstrate how air pressure transmits force and how air lag impacts response time.
  • Spring Mechanism Testing: Examine how spring tension influences emergency braking performance.
  • Stopping Distance Experiment: Calculate and compare stopping distances under different conditions (e.g., loaded vs. unloaded vehicle, wet vs. dry road).

5. Key Takeaways

  • Air, fluid, and spring mechanics play a crucial role in the functionality of braking systems.
  • Braking involves complex interactions between vehicle physics and system dynamics.
  • Factors such as weight, speed, and road conditions significantly affect braking performance.

In this module, drivers and students will explore the major components and sub-circuits of a typical air brake system. Participants will learn about:

1. Overview of Air Brake Systems

1.1 What Are Air Brake Systems?

Air brake systems use compressed air to apply braking force, making them ideal for heavy-duty vehicles due to their reliability and effectiveness under load.

1.2 Importance of Air Brake Systems

  • Provide powerful and consistent braking for large vehicles.
  • Include fail-safe mechanisms, such as emergency and parking brakes, for added safety.
  • Offer better performance compared to hydraulic brakes in commercial and industrial applications.

2. Major Components of a Typical Air Brake System

2.1 Air Compressor

  • Function: Compresses air and supplies it to the air reservoirs.
  • Operation: Powered by the vehicle’s engine, the compressor ensures a continuous supply of air.
  • Maintenance Tip: Check for leaks and ensure proper lubrication.

2.2 Air Reservoirs (Tanks)

  • Function: Store compressed air for braking.
  • Types: Primary and secondary reservoirs ensure redundancy and maintain air supply.
  • Maintenance Tip: Drain regularly to remove moisture and prevent corrosion.

2.3 Brake Chambers

  • Function: Convert air pressure into mechanical force to apply the brakes.
  • Types:
    • Service Brake Chambers: Used during normal braking.
    • Spring Brake Chambers: Activate parking and emergency brakes.

2.4 Slack Adjusters

  • Function: Adjust the brake stroke to maintain effective braking.
  • Maintenance Tip: Regularly inspect and adjust for proper clearance.

2.5 Brake Shoes and Drums (or Pads and Rotors)

  • Function: Create the friction needed to stop the vehicle.
  • Types:
    • Drum Brakes: Use brake shoes to press against a drum.
    • Disc Brakes: Use pads to clamp onto a rotor.

2.6 Air Lines and Hoses

  • Function: Transport compressed air to various components.
  • Maintenance Tip: Inspect for cracks, wear, and leaks.

2.7 Air Dryer

  • Function: Removes moisture and contaminants from the compressed air to prevent freezing and corrosion.
  • Maintenance Tip: Replace desiccant cartridges as needed.

2.8 Governor

  • Function: Regulates the air compressor, ensuring air pressure stays within a safe range.

2.9 Foot Valve (Brake Pedal)

  • Function: Controls the flow of air to the brake chambers, initiating braking.

3. Sub-Circuits of the Air Brake System

3.1 Service Brake Circuit

  • Purpose: Provides braking during normal driving conditions.
  • Components: Foot valve, brake chambers, and air reservoirs.
  • Operation: Compressed air from the reservoirs flows to the brake chambers, applying the brakes.

3.2 Emergency Brake Circuit

  • Purpose: Engages the brakes automatically in case of air pressure loss.
  • Components: Spring brake chambers and emergency relay valve.
  • Operation: When air pressure drops below a safe level, springs in the chambers activate the brakes.

3.3 Parking Brake Circuit

  • Purpose: Keeps the vehicle stationary when parked.
  • Components: Spring brake chambers and control valves.
  • Operation: Air pressure is released from the chambers, allowing the springs to hold the brakes in place.

3.4 Supply Circuit

  • Purpose: Maintains and distributes air pressure throughout the system.
  • Components: Air compressor, reservoirs, air dryer, and governor.
  • Operation: Compresses and distributes air to the braking system components.

4. System Safeguards

4.1 Dual-Circuit Design

  • Purpose: Separates the braking system into two independent circuits for added safety.

4.2 Low Air Pressure Warning

  • Purpose: Alerts the driver when air pressure drops below a safe level, preventing system failure.

4.3 Emergency Brakes

  • Purpose: Automatically engage if air pressure is lost, ensuring the vehicle can still stop.

5. Hands-On Training and Demonstration

5.1 Component Identification

  • Drivers/students will visually identify and understand the function of each component.

5.2 Air Flow Demonstration

  • Observe how compressed air moves through the system and activates different circuits.

5.3 Practical Exercises

  • Perform air reservoir draining and basic component inspections.
  • Test the function of service, emergency, and parking brakes.

6. Key Takeaways

  • Knowledge of system safeguards, such as dual circuits and emergency brakes, enhances safety awareness.
  • Understanding the components and sub-circuits of air brake systems is critical for safe vehicle operation.
  • Regular maintenance ensures system reliability and longevity.

In this module, drivers and students will gain a comprehensive understanding of the functionality of foundation brakes, including:

Air Disc Brakes

Overview

Air disc brakes are a modern braking system commonly used in commercial vehicles for their efficiency and reduced maintenance needs. They use a disc and caliper system, similar to hydraulic disc brakes in passenger vehicles, but are operated by air pressure.

Components

  • Brake Rotor (Disc): The rotating component that the brake pads clamp onto.
  • Brake Pads: Stationary components that create friction against the rotor.
  • Caliper: Houses the brake pads and applies pressure to them.
  • Brake Chamber: Converts air pressure into mechanical force to activate the caliper.

How It Works

  1. Activation: When the brake pedal is pressed, air pressure from the brake chamber activates a mechanical linkage or piston in the caliper.
  2. Pad Compression: The caliper squeezes the brake pads against the rotor.
  3. Friction and Stopping: The friction between the pads and the rotor slows the wheel’s rotation, stopping the vehicle.
  4. Release: When the brake pedal is released, the caliper retracts the pads, and the rotor spins freely.

Advantages

  • Improved Braking Performance: Air disc brakes provide consistent braking force and are less prone to fade.
  • Lower Maintenance: Reduced wear on components compared to drum brakes.
  • Better Heat Dissipation: The open design of the disc allows for better cooling.
  • Quicker Response: Shorter stopping distances due to more efficient operation.

Challenges

  • Higher initial cost.
  • More complex system compared to S-Cam or Wedge brakes.

S-Cam Brakes

Overview

S-Cam brakes are the most commonly used braking system in heavy-duty vehicles, such as trucks and buses. They rely on an “S”-shaped cam to apply force to the brake shoes, which then press against the brake drum to slow or stop the vehicle.

Components

  • Brake Drum: The rotating part of the brake system that the brake shoes press against.
  • Brake Shoes and Linings: Stationary components that make contact with the drum to create friction.
  • S-Cam: An “S”-shaped camshaft that spreads the brake shoes apart when rotated.
  • Slack Adjuster: Ensures proper adjustment of the brake stroke.
  • Brake Chamber: Converts air pressure into mechanical force to activate the S-Cam.

How It Works

  1. Activation: When the brake pedal is pressed, air pressure from the brake chamber pushes the push rod.
  2. Camshaft Rotation: The push rod moves the slack adjuster, which rotates the S-Cam.
  3. Spreading Shoes: The rotation of the S-Cam spreads the brake shoes apart, pressing them against the brake drum.
  4. Friction and Stopping: The friction between the shoes and the drum slows the wheel’s rotation, stopping the vehicle.
  5. Release: When the brake pedal is released, return springs pull the shoes back, and the S-Cam returns to its resting position.

Advantages

  • Simple and durable design.
  • Widely available parts.
  • Effective for heavy-duty applications.

Wedge Brakes

Overview

Wedge brakes are less common but are still used in some applications. They use a wedge mechanism to force the brake shoes against the drum.

Components

  • Brake Drum: Similar to the S-Cam system.
  • Brake Shoes and Linings: Create friction against the drum.
  • Wedge Mechanism: A wedge-shaped component that pushes the brake shoes outward.
  • Brake Chamber: Supplies the air pressure needed to drive the wedge.

How It Works

  1. Activation: Air pressure from the brake chamber pushes a piston.
  2. Wedge Movement: The piston drives a wedge between the brake shoes.
  3. Shoe Expansion: The wedge forces the brake shoes outward against the drum.
  4. Friction and Stopping: The friction between the shoes and the drum slows the vehicle.
  5. Release: When the brakes are released, return springs pull the shoes and wedge back to their original positions.

Advantages

  • Fewer moving parts compared to S-Cam brakes.
  • Can provide a self-energizing effect, requiring less input force.

Challenges

  • More complex to adjust and maintain.
  • Less common, making parts and expertise harder to find.

In this module drivers/students will learn how to conduct a thorough visual inspection of their vehicle’s air brake system.

Here’s an expanded breakdown of the key components and steps involved in a visual brake system inspection:

Introduction to Air Brake System Components

  • Overview of the Air Brake System: A brief review of the main components of the air brake system, including the air compressor, air tanks, brake chambers, slack adjusters, brake pads, and hoses.
  • Importance of Visual Inspections: Understanding how a visual inspection can help detect problems like leaks, worn components, or other safety hazards that could compromise braking performance.

Inspecting Air Lines and Hoses

  • Checking for Leaks: Inspecting air lines and hoses for signs of leaks, cracks, or wear. Look for any signs of moisture or oil, which could indicate a problem with the system.
  • Ensuring Secure Connections: Ensuring that all air line connections are secure and free from damage. Loose or corroded fittings can lead to air loss and decreased brake performance.
  • Hose Condition: Checking for abrasions, kinks, or cuts in the hoses, which can cause air pressure loss. Hoses should be flexible and free of any signs of wear.

Examining Air Tanks

  • Checking for Corrosion or Damage: Inspecting the air tanks for any visible signs of corrosion, rust, or dents. Corroded tanks may weaken over time and could potentially fail, leading to system malfunction.
  • Drainage: Ensuring that the air tanks are properly drained of moisture. Moisture in the tanks can lead to rust and reduced system efficiency, so it’s important to drain them regularly.
  • Tank Mounting: Verifying that the air tanks are securely mounted and free from any loose parts or components that could cause them to shift or become dislodged during operation.

Air Compressor Inspection

  • Visual Check for Leaks: Checking around the air compressor for any visible signs of air leaks, oil leaks, or damage. Leaking air compressors can lead to insufficient pressure for braking.
  • Compressor Belt and Mounting: Inspecting the belt (if applicable) for wear and ensuring it is properly tensioned. Also, checking that the compressor is securely mounted and not showing signs of movement or looseness.

Brake Chambers and Slack Adjusters

  • Brake Chamber Inspection: Inspecting the brake chambers for cracks, leaks, or damage. Brake chambers should be securely mounted and free from any signs of corrosion or physical damage.
  • Slack Adjuster Check: Ensuring that the slack adjusters are properly adjusted and that the linkage is not loose or excessively worn. Slack adjusters should move freely and maintain the proper brake stroke to ensure efficient braking.
  • Push Rod Inspection: Verifying that the push rods are securely attached and not showing signs of wear or misalignment. A misaligned push rod can affect brake performance and should be addressed immediately.

Brake Pads and Shoes

  • Pad and Shoe Wear: Checking the brake pads or shoes for excessive wear. Worn pads or shoes will reduce braking effectiveness and may need to be replaced. Measuring the thickness of the pads or shoes to ensure they meet the manufacturer’s minimum specifications.
  • Even Wear: Ensuring that the wear on the brake pads or shoes is even. Uneven wear could indicate problems with the alignment, brake components, or other parts of the system.
  • Cleaning: Ensuring that the brake components are free from debris, dirt, or oil, which can reduce braking efficiency.

Check for Leaks in the Brake System

  • Leak Test: Performing a simple leak test by applying the brake and listening for any air leaks. This can help detect issues such as worn seals, loose fittings, or damaged components.
  • Using Soapy Water: Using soapy water to spray around air connections and fittings to visually check for bubbles, which indicate air leaks.

Inspecting Brake Drums or Discs

  • Brake Drum/Disc Condition: Checking the condition of the brake drums or discs for any signs of cracking, warping, or excessive wear. Uneven wear or visible cracks can compromise braking performance and require immediate attention.
  • Drum/Disc Surface: Ensuring that the surface of the drums or discs is smooth and free from scoring or grooves that could affect the braking surface and cause inefficient braking.

Adjusting and Checking Brake Stroke

  • Measuring Brake Stroke: Using a brake stroke gauge to measure the brake stroke and ensure that it is within the manufacturer’s specifications. If the stroke is too long, it could indicate issues with brake adjustment or worn brake components.
  • Adjusting Brake Stroke: If necessary, adjusting the slack adjusters to ensure that the brake stroke is within the proper range for optimal performance.

Inspection of the Parking Brake

  • Parking Brake Operation: Ensuring that the parking brake is fully functional and engages/disengages smoothly. Checking the parking brake components for any visible damage or wear.
  • Adjusting Parking Brake: If the parking brake does not hold the vehicle securely, adjustments may be necessary to ensure proper engagement.

Visual Check for Fluid Leaks

  • Fluid Levels: Ensuring that the brake fluid (in hydraulic systems) or lubricants are at the proper levels. Low fluid levels can lead to poor brake performance and system failure.
  • Inspecting for Leaks: Checking around brake lines, cylinders, and reservoirs for signs of leaks or fluid contamination, which could indicate a need for repair or maintenance.

Documenting Findings and Reporting Issues

  • Recording Inspection Results: Keeping accurate records of the inspection, noting any issues found and any repairs or adjustments made. This helps maintain a history of the vehicle’s brake system and ensures ongoing safety.
  • Reporting Issues: Reporting any significant issues or defects found during the inspection to the appropriate personnel or maintenance team for further investigation or repair.

Safety Considerations During Inspection

  • Personal Protective Equipment (PPE): Using the appropriate PPE, such as gloves and safety glasses, during the inspection to protect against dirt, debris, and potential hazards.
  • Vehicle Stability: Ensuring that the vehicle is properly secured and on level ground before performing the inspection to prevent accidental movement.
  • Pressure Release: Safely releasing any built-up air pressure before inspecting components to avoid injury from sudden air release or component movement.

Final Review and Summary

  • Maintaining the Brake System: Emphasizing the importance of regular visual inspections as part of a preventive maintenance routine to ensure that the air brake system is always functioning optimally and safely.
  • Rechecking the System: After the visual inspection, reviewing all the components and ensuring that nothing has been overlooked.

In this module drivers/students we learn how to perform a series of simple yet very effective air system functional tests.

Here’s an expanded outline of what the tests will typically cover:

Pre-Test Preparation:

  • Review of safety protocols and proper equipment handling.
  • Ensuring the system is properly set up and all components are ready for testing.
  • Calibration of necessary instruments for accurate measurements.

Air Pressure Test:

  • Verifying that the system maintains the correct pressure levels.
  • Identifying any pressure drops or leaks that could indicate problems.
  • Testing the pressure regulator to ensure it’s functioning properly.

Flow Rate Test:

  • Measuring the air flow through the system to confirm it matches the specifications.
  • Ensuring that there are no blockages or restrictions in the system.
  • Testing the air compressor and other related components to check for performance.

Temperature Test:

  • Checking that the air temperature is within the optimal range for the system to work efficiently.
  • Identifying any areas where the system may be overheating or cooling excessively.

Functional Operation Test:

  • Ensuring that all components of the air system, such as valves, switches, and sensors, are functioning as expected.
  • Running through the system’s start-up and shut-down procedures to ensure smooth operation.

Leak Detection:

  • Conducting a thorough check for any leaks in the system using appropriate tools and methods, such as soapy water or ultrasonic leak detectors.
  • Ensuring that the air system is sealed properly to prevent inefficiency or safety risks.

Post-Test Analysis:

  • Analyzing the results of the tests to identify any discrepancies or areas for improvement.
  • Documenting the findings and creating a report to ensure proper follow-up and corrective actions if necessary.

Troubleshooting and Maintenance:

  • Using the test results to diagnose any issues with the system.
  • Learning how to perform basic maintenance and repairs to keep the air system in optimal condition.

In this module drivers/students will learn how to perform routine air system maintenance and brake stroke measurement.

Here’s an expanded overview of the topics covered in this module:

Routine Air System Maintenance
  • Checking Air Pressure Levels: Understanding the importance of maintaining the correct air pressure in the system. Students will learn how to monitor pressure gauges and ensure that the system is within the recommended operating range.
  • Inspecting Air Lines and Connections: Identifying potential air leaks or damage in the air lines, hoses, and connections. Regularly inspecting these components can prevent system failure and improve air system efficiency.
  • Cleaning and Replacing Air Filters: Learning how to check and clean air filters, ensuring that the air entering the system is clean and free from debris. Students will also learn how to replace filters when necessary to maintain system performance.
  • Draining the Air Tanks: Understanding the importance of regularly draining moisture from the air tanks to prevent rust and corrosion, which can damage the system and affect braking performance.
  • Testing the Air Compressor: How to check the air compressor for proper function. Students will learn how to assess the compressor’s output and verify that it is supplying enough pressure for the system’s needs.
  • Checking for Leaks: Learning to perform a visual inspection and use leak detection methods (e.g., soapy water) to check for air leaks in the system, particularly around fittings and valves.
  • Lubrication and Fluid Checks: Understanding the role of lubrication in the air system and performing regular fluid checks to ensure that the system operates smoothly. Students will also learn how to top off or replace air system lubricants if necessary.
Brake Stroke Measurement
  • Understanding Brake Stroke: The brake stroke refers to the distance the brake pedal or slack adjuster moves when pressure is applied. This measurement is important for ensuring that the brake system is functioning properly and that the brakes are engaging effectively.
  • Measuring Brake Stroke: Students will learn how to measure brake stroke using tools such as a brake stroke gauge or ruler. This involves checking the distance the brake push rod or slack adjuster moves when the brakes are applied.
  • Brake Stroke Limits: Understanding the manufacturer’s specifications for brake stroke limits and how to compare the measured stroke with these values. Excessive brake stroke can indicate problems such as worn brake linings or misadjusted brakes.
  • Adjusting Brake Stroke: Learning how to adjust the brake stroke if necessary, ensuring that the brakes engage fully without overextending. This includes adjusting the slack adjusters on drum brakes to maintain proper brake performance.
  • Importance of Proper Brake Stroke: Emphasizing how proper brake stroke ensures that the vehicle’s brakes engage in a timely and efficient manner, helping to prevent excessive wear, brake fade, or unsafe braking distances.
Troubleshooting Common Air System and Brake Issues
  • Diagnosing Air System Problems: Students will learn how to troubleshoot common issues with the air system, such as low air pressure, leaks, or compressor failure. They will also understand how to resolve these problems to restore system function.
  • Identifying Brake Problems: How to spot signs of braking system issues, such as uneven brake wear, unusual noises, or increased brake stroke. Students will learn the steps to take when problems are identified, including making adjustments or seeking professional repairs.
  • Brake Performance Checks: How to check the performance of the air brakes, including ensuring that the brakes engage fully and that the vehicle stops within a safe distance.
Safety Considerations
  • Personal Protective Equipment (PPE): Understanding the importance of wearing appropriate PPE when working on the air system, such as gloves and safety glasses, to prevent injury.
  • Safe Air System Pressurization: Learning how to safely pressurize and depressurize the air system to avoid accidents or injuries when working on the components.
  • Proper Ventilation: Ensuring that the work area is well-ventilated, especially when working with air tanks or compressors, to prevent the buildup of harmful gases.
  • Lockout/Tagout Procedures: The importance of following lockout/tagout procedures when servicing the air system to prevent accidental activation of the system during maintenance.
Record Keeping and Maintenance Schedules
  • Maintaining a Maintenance Log: The importance of keeping accurate records of all air system maintenance and brake stroke measurements, including dates, tasks performed, and any parts replaced.
  • Following Manufacturer’s Recommendations: Understanding the manufacturer’s recommended maintenance schedule and adhering to it to ensure the system operates reliably over time.
  • Proactive Maintenance: The importance of performing regular preventive maintenance, even when no immediate issues are detected, to avoid costly repairs and ensure vehicle safety.
Practical Applications and Hands-On Training
  • Air System Maintenance Exercises: Students will practice performing routine air system maintenance tasks, including draining air tanks, checking air lines, and testing the compressor.
  • Brake Stroke Measurement Practice: Hands-on training in measuring brake stroke and making adjustments to ensure proper brake function.
  • Problem-Solving Scenarios: Real-world scenarios where students will troubleshoot and resolve common air system and brake issues, applying the skills learned in the module.

Bryan Duross
TECHNICAL TRAINING SERVICES
Telephone: 519-621-0708
E-Mail: bduross@sentex.net

For a FREE full-version demo, Contact Us!

Quick Study Straight Truck & Bus

Available Formats

Traditional Install

Online