ABI Classroom Edition logo

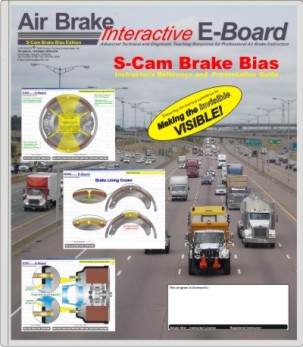
AIR BRAKE The Interactive E-Board S-Cam Brake Bias Edition is a powerful teaching tool. It is designed for fleet air brake trainees and technical school instructors.

The program offers:

  • A detailed guide for instructors.
  • An advanced multimedia display.

After completing the training, students and technicians will be able to identify and fix S-Cam brake bias accurately.

What’s Included:

Sample Animations


Foundation Brake Diagnostics

What is S-Cam Brake Bias?

Brake bias this is a common issue with S-Cam brakes. While it’s most often found in trailer brakes, it can also impact the drive or steer axles of trucks, buses, and tractors.

Brake bias happens when the stationary brake parts are misaligned with the brake drum center and wheel rotation. This misalignment causes uneven contact between the brake shoes and the drum.

Where S-Cam Brake Bias Occurs:

  • Trailer Brakes: S-Cam brake bias is most frequently observed in trailer brakes due to their high load variability and operational stresses.
  • Drive and Steer Axles: Although less common, brake bias can also affect the drive or steer axles of trucks, buses, and tractors. This can have a significant impact on vehicle stability and stopping performance.

How Brake Bias Happens:

Brake bias occurs when there is a misalignment of the stationary components of the brake system, such as:

  • S-Cam Shaft and Bushings: Misaligned or worn components can cause uneven force distribution.
  • Brake Shoes: Improperly seated or misaligned shoes lead to uneven contact with the drum.
  • Anchor Points: Poor positioning or wear in the anchor pins or brackets affects the pivot point of the brake shoes.
  • Brake Drum Centering: A drum that is not perfectly centered with the wheel or axle causes inconsistent shoe engagement.

Impact of Brake Bias:

  • Uneven Brake Shoe and Drum Wear
  • Reduced Braking Performance
  • Vehicle Instability
  • Thermal Stress
  • Increased Safety Risks

Diagnosing Brake Bias:

Brake bias can often be identified by:

  • Uneven Lining Wear Patterns
  • Heat Patterns
  • Operational Symptoms

Brake Bias Can Result In:

  • Brake Noise and Vibration Issues
  • Significantly Reduced Service and Spring Brake Performance
  • Over-adjustment of Automatic Brake Adjuster
  • Uneven Wear of Brake Linings
  • Overheating of Brake Linings
  • Deterioration of Brake Linings (Breakdown)
  • Brake Fires

Brake bias often goes undetected because the technician may not be aware of the issues it can cause or may not know how to identify and fix the problem. In any case, this can lead to some or all of the issues mentioned above.

For more information on each module, click on the “v”.
EB-SC Content
Brake bias refers to the distribution of braking force between the front and rear axles of a vehicle. Achieving proper brake bias is critical for ensuring optimal brake performance, maintaining durability, and ensuring vehicle safety.

In this scenario, a routine brake service is conducted on a heavy-duty vehicle equipped with an S-Cam air brake system. However, during the service, the importance of brake bias is overlooked, leading to an imbalance in braking forces. This oversight may seem minor initially but can have significant implications:

Potential Impacts of Ignoring Brake Bias:

1. Uneven Brake Wear:
An improperly balanced brake system can cause excessive wear on one axle (typically the rear), reducing the lifespan of brake components.

2. Reduced Braking Performance:
If the rear brakes apply too much force relative to the front, it can lead to wheel lockup, reduced stability, and longer stopping distances.

3. Vehicle Safety Concerns:
Brake imbalance increases the risk of accidents, especially in emergency braking or adverse conditions, as the vehicle may skid or become difficult to control.

4. Thermal Overload:
Uneven braking forces can cause excessive heat buildup in overworked brakes, leading to brake fade and possible component failure.

5. Operational Downtime:
Premature brake wear and potential system failures may result in costly repairs and vehicle downtime.

The Precision S-Cam Brake is a key component in air brake systems commonly used in heavy-duty vehicles. This system ensures reliable braking performance by converting air pressure into mechanical force to stop the vehicle. Understanding its components and functionality is critical for proper maintenance and troubleshooting.

Key Features:

1. Detailed Animation of Components:

The Precision S-Cam Brake includes an interactive, detailed animation that showcases the following components:

  • Brake Drum: The rotating surface against which the brake shoes press to create friction.
  • S-Cam: A cam-shaped shaft that rotates to push the brake shoes outward against the drum.
  • Brake Shoes: Curved frictional surfaces that make contact with the brake drum.
  • Rollers: Positioned at the ends of the brake shoes to transfer motion from the S-Cam.
  • Return Springs: Pull the brake shoes back to their resting position when the brake is released.
  • Slack Adjuster: Maintains proper clearance between the brake shoes and drum, compensating for wear.
  • Push Rod: Connects to the air chamber to transmit force to the slack adjuster.

2. Assembly Demonstration:

The animation illustrates the step-by-step assembly process, including:

  1. Positioning the S-Cam within the brake system.
  2. Installing the brake shoes and rollers.
  3. Connecting the slack adjuster and push rod.
  4. Aligning the return springs to ensure smooth operation.

3. Functionality in Action:

The animation highlights how the system operates under various conditions:

  • Brake Application:
    Air pressure from the brake chamber pushes the rod, rotating the S-Cam. The cam’s lobes press against the rollers, forcing the brake shoes outward to engage the drum.
  • Brake Release:
    Air pressure is released, and the return springs retract the brake shoes, disengaging them from the drum.

The S-Cam Brake is one of the most widely used air brake systems in heavy-duty vehicles such as trucks, trailers, and buses. Its simplicity, reliability, and effectiveness make it the industry standard for drum brake systems. This overview outlines a typical S-Cam brake system’s design, operation, and maintenance.

  • 1. Design of an S-Cam Brake System
  • 2. Operation of an S-Cam Brake System
  • 3. Maintenance of an S-Cam Brake System

Clearly explains what brake bias is, where it happens, and its impact on brake performance, lifespan, and safety.

Where Does Brake Bias Occur?

  • Front-to-Rear Bias
  • Left-to-Right Bias
  • Axle-to-Axle Bias in Multi-Axle Vehicles

Explains the factors in axles and S-Cam brake components that can lead to brake bias.

Below is an expanded explanation of the factors contributing to brake bias.

Factors in Axles That Cause Brake Bias

Axle Load Imbalance:

  • Uneven weight distribution across axles or wheels, often caused by improper cargo loading, leads to unequal braking forces.
  • For example, a heavily loaded rear axle may require more braking force, but an unbalanced system might overwork the front brakes instead.

Axle Misalignment:

  • Misaligned axles cause the wheels to operate at slight angles, leading to uneven contact between brake shoes and the drum.
  • This misalignment can result from poor assembly, road impacts, or worn suspension components.

Differing Axle Speeds:

  • Variations in wheel rotation speed due to uneven tire sizes, inflation, or axle configurations can affect braking force distribution.

Axle Manufacturing Defects:

  • Inconsistencies in axle dimensions, strength, or surface finish can result in improper alignment of the braking system.
  • For example, slightly bent or out-of-spec axles may cause brake shoes to contact the drum unevenly.

Factors in S-Cam Brake Components That Cause Brake Bias

  • S-Cam Shaft Issues
  • Brake Shoes and Linings
  • Rollers and Bushings
  • Return Springs
  • Slack Adjuster Issues

Explains brake lining crowning, coining, and initial growth.

Crowning of Brake Linings

What is Crowning?

  • Crowning refers to the slight curvature or contour intentionally designed into the surface of a brake lining. This curvature ensures proper contact between the brake lining and the drum during the initial braking applications.

Coining of Brake Linings

What is Coining?

  • Coining is a manufacturing process used to compress the brake lining material to its final density and shape. It involves applying high pressure to the lining during or after the molding process.

Initial Growth of Brake Linings

What is Initial Growth?

  • Initial growth refers to the slight expansion or deformation of the brake lining that occurs during the first few applications of the brakes. This process is a natural part of the bedding-in phase, where the lining adjusts to the brake drum.

Shows an animation of how a non-biased S-Cam brake works and highlights the factors for proper brake performance.

How a Non-Biased S-Cam Brake Works:

In a non-biased S-Cam brake system, the braking force is evenly distributed across the brake shoes, resulting in smooth and effective braking. Here’s a step-by-step breakdown of how the brake functions during normal application:

Brake Chamber Activation:

  • When the driver applies the brake pedal, air (or hydraulic fluid, depending on the system) is sent to the brake chambers at each wheel.
  • The air pressure pushes the diaphragm in the brake chamber, causing the pushrod to extend.

Pushrod Movement:

  • As the pushrod extends, it pushes the S-Cam shaft, which is connected to the brake shoes. The S-Cam shaft is a cylindrical component with a cam (eccentric) shape.

S-Cam Rotation:

  • The S-Cam shaft rotates as it is pushed, causing the S-Cam to move inside the brake assembly.
  • The cam’s eccentric shape pushes the brake shoes outward, pressing them against the brake drum.

Even Force Distribution:

  • In a non-biased system, the force applied by the S-Cam is even across both the primary and secondary brake shoes. This ensures that both shoes engage with the drum simultaneously and with equal force.
  • The anchor points for the brake shoes are in proper alignment, allowing the shoes to pivot and apply pressure evenly.

Friction and Stopping Power:

  • As the shoes press against the drum, friction is created, which slows down the vehicle.
  • The evenly distributed force ensures that both shoes contribute to the braking effort equally, preventing any imbalance in the braking performance.

Brake Shoe and Drum Interaction:

  • The friction between the brake shoes and the drum slows the rotation of the wheel. The force is transmitted through the shoes to the axle, effectively stopping the vehicle.

Release of Brake Pressure:

  • Once the driver releases the brake pedal, the air pressure is released from the brake chambers, and the pushrod retracts.
  • The S-Cam shaft rotates back to its original position, allowing the brake shoes to retract away from the drum and disengage, allowing the wheels to rotate freely again.

Brake bias in S-Cam braking systems can manifest in several different ways, each with its own unique causes and consequences. Below are the types of brake bias scenarios—Cam Bias, Anchor Bias, Primary Shoe Bias, Secondary Shoe Bias, and Combination Bias—explained in detail, along with the related issues affecting S-Cam brake performance and service life.

1. Cam Bias – What is Cam Bias?

  • Cam bias occurs when the S-Cam shaft applies uneven force to the brake shoes. This imbalance typically happens when the S-Cam lobes are worn, misaligned, or damaged, leading to one brake shoe being applied more forcefully than the other.

2. Anchor Bias – What is Anchor Bias?

  • Anchor bias occurs when the anchor points (or brake shoe pivots) are worn, misaligned, or incorrectly installed. This causes the brake shoes to engage unevenly with the brake drum, applying more force to one side.

3. Primary Shoe Bias – What is Primary Shoe Bias?

  • Primary shoe bias occurs when the primary brake shoe (the shoe that engages first when the brakes are applied) applies more braking force than the secondary shoe. This imbalance is typically caused by improper adjustment or component wear.

4. Secondary Shoe Bias – What is Secondary Shoe Bias?

  • Secondary shoe bias occurs when the secondary brake shoe (the shoe that engages after the primary shoe) applies more braking force than the primary shoe. This often happens when the brake shoes are improperly adjusted or if one shoe has excessive friction material compared to the other.

5. Combination Bias – What is Combination Bias?

  • Combination bias occurs when multiple factors, such as cam bias, anchor bias, and primary/secondary shoe bias, combine to create an overall imbalance in braking force distribution. This complex scenario often results in a combination of wear patterns and braking issues that affect the vehicle’s braking efficiency.

Displays brake lining wear patterns that show brake bias. It also describes how to measure brake bias during brake shoe and drum replacement. Below is a detailed explanation of how to recognize and measure brake bias.

Brake Lining Wear Patterns That Indicate Brake Bias

  1. Uneven Wear Across Brake Shoes:
    • Leading Shoe Overwear:
      If the leading shoe shows significantly more wear than the trailing shoe, it indicates that the force applied by the S-Cam is uneven.
    • Trailing Shoe Overwear:
      Excessive wear on the trailing shoe can signal issues such as misaligned brake shoes or improper adjustment of the S-Cam.
  2. Uneven Wear Across Axles:
    • If the brake linings on one axle wear faster than those on another, it suggests an imbalance in braking force distribution, often due to slack adjuster issues or axle load imbalances.
  3. Tapered Wear on Individual Shoes:
    • Tapered wear (one end of the shoe being thinner than the other) may result from a bent S-Cam shaft, misaligned brake components, or improper installation.
  4. Glazed or Burnt Linings:
    • Glazing or burn marks on one brake shoe indicate excessive heat due to overloading, dragging, or improper force distribution, all of which are signs of brake bias.
  5. Localized Wear Patterns:
    • If wear is concentrated in specific areas of the lining, it may indicate improper contact between the shoe and drum due to misalignment or deformed components.

Measuring Brake Bias During Brake Shoe and Drum Replacement

1. Visual Inspection:

  • Inspect the brake linings and drums for uneven wear patterns, glazing, or heat spots.
  • Check for cracks, chips, or deformation in the brake shoes or drums, which may signal improper force distribution.

2. Measuring Brake Shoe Thickness:

  • Use a micrometer or caliper to measure the thickness of the brake linings at multiple points along the shoe.
  • Compare the measurements of leading and trailing shoes, as well as between shoes on the same axle. Uneven measurements indicate bias.

3. Inspecting the Brake Drum:

  • Measure the inner diameter of the drum using a drum micrometer.
  • Look for variations in diameter or heat damage, which may suggest uneven braking force.

4. Testing S-Cam Rotation:

  • Rotate the S-Cam shaft manually to check for smooth operation and even engagement of the brake shoes.
  • Binding or irregular motion can indicate issues that contribute to brake bias.

5. Checking Slack Adjuster Settings:

  • Measure the pushrod travel distance for each brake chamber using a ruler or gauge.
  • Ensure that the travel distance is consistent across all slack adjusters. Inconsistent measurements indicate uneven force application.

6. Assessing Air Pressure (For Air Brakes):

  • Use a pressure gauge to ensure consistent air pressure is reaching all brake chambers.
  • Variations in pressure can lead to unequal braking force and wear.

7. Brake Balance Test (Dynamic Measurement):

  • Conduct a brake balance test using a dynamometer or similar equipment to measure the braking force at each wheel.
  • Compare the forces across all wheels to identify any imbalances.

How to Address Brake Bias Issues Identified

1. Replace Worn or Damaged Components:

  • Replace brake shoes, linings, or drums that show uneven wear, glazing, or damage.

2. Adjust Slack Adjusters:

  • Ensure that all slack adjusters are correctly adjusted to maintain consistent pushrod travel.

3. Inspect and Realign Components:

  • Check for and correct any misaligned S-Cam shafts, brake shoes, or axles.

4. Lubricate Moving Parts:

  • Ensure proper lubrication of S-Cam shafts, bushings, and rollers to allow smooth operation.

5. Check Air or Hydraulic Systems:

  • For air brakes, inspect air lines, valves, and chambers for leaks or blockages.
  • For hydraulic brakes, check for consistent fluid levels and pressure.

6. Regular Maintenance and Testing:

  • Conduct periodic inspections and dynamic tests to identify and correct minor issues before they escalate.
For more information and to discuss your specific needs, ideas, or questions with one of our expert teaching resource developers, we encourage you to reach out to us. Our team is dedicated to creating high-quality, engaging, and effective teaching materials tailored to your unique requirements. Please don’t hesitate to contact us via:

Bryan Duross
TECHNICAL TRAINING SERVICES
Telephone: 519-621-0708
E-Mail: bduross@sentex.net

Contact Us for a FREE Full-Version Demo!

E-Board S-Cam Brake Bias

Available Formats

Standard Installation

Online Access